I am currently hosting a Domino Mini Book swap over at my Marie Antoinette Mail Art group. I really wanted it to be easy for people to play even if they had never made one before, so I included a tutorial detailing exactly how I assembled my lil' books. Another member, the sweet and amazingly talented Terri, at Artful Affirmations tried some of her own and suggested I share the very same tutorial with you. So here goes... :)
This PART 1 will detail the making of the Domino Mini Books. In Part 2 and Part 3, I will share more photos of my finished books and tips too! The measurements on this tutorial are for 1"x2" dominoes. You may need to modify if your dominoes are a tad larger or smaller.
Cut your interior BASE paper to 1 7/8"x9". My paper here has a scalloped edge to add some detail, but same basic idea.
For your first score mark your paper should be facing up on the side you intend to decorate. (Here, I want to decorate the plainer, lined side; and leave the prettier glittered side for the back of the book undecorated. **Score at 7/8"
Flip paper over. Place first score mark at 7/8". Score again.
Continue to flip paper over and score, with previously scored mark at 7/8".
Fold in fan fashion on all scored lines.
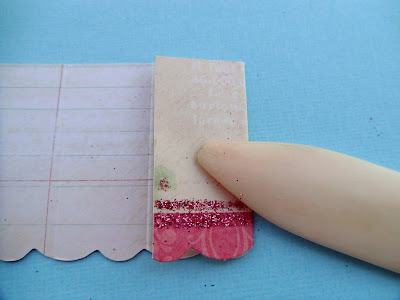
Back and forth, using folder to crease well.
You may notice an overhang on the very last page. (I over-measured the 9" to allow this on purpose.) Trim this off even with the folds.
So here is how the BASE paper should look folded to allow for 10 interior pages, placed with your domino covers.
***You will want to decorate your covers BEFORE you put your book together. Believe me, I did it both ways, and decorating (especially inking) the covers afterward was quite difficult.***
Cut lengths of ribbon or lace to tie the covers shut. Over measure to allow enough to tie a bow. You can always trim later. Glue to center line of each domino front and back (I used 3 in 1 again).
Then attach your fan folded BASE paper to the front cover, centering the space at each edge. Go light enough on the glue so it doesn't squeeze out onto your ties.
Attach the back cover in the same way.
Before you attach your interior pages, you may want to distress ink your BASE paper sides, folds and creases. I cut my interior pages to 3/4"x 1 3/4". Here I did shorten that measurement a bit to allow for a nice border with the scalloped edge.
So that's that. :) I hope this tutorial was useful to you and that you enjoy making your own teensy tiny mini books. I find them quite addicting. I always knew there would be a use for the favorite bitty scraps I have been holding onto. Hee hee!
Happy Monday, Holls


4 comments:
Thank you for the TUT and I see the group your doing the swap in is by invitation only. How could I get a lovely invitation? found you through Terri.
Love Dawn xx
WOW! Thanks so much for the tutorial - I've looked through all three posts, and your work is exquisite. What a fabulous idea - I will definitely try this! Gorgeous work!!!
om-goodness
this is such a great idea!!
I love how mini they are and the dominoes!!!
Awesome.
This helps me so very much. Thank you!
Post a Comment